All NPS Image Editor extensions generally follow the same format:
- They are located in the "Extensions" folder in NPS Image Editor's installation directory
- They generally follow the naming convention of
Type.Name. Filters all start with Filter.
- The
extension.ini file defines basic information about the extension.
Basic information
The filter samples have pre-filled extension.ini that you can access within Visual Studio. You should fill
out the Name, Author, Description that appears in the Filter Gallery, and then under
the [Filter] section fill out the Category. You can ignore the [UI] section for now –
we'll come back to it in the next topic.
You should additionally update your .csproj or .vbproj file to ensure that the name, copyright, and version
information in the DLL is accurate.
Executables
NPS 4.x extensions utilize DLLs that implement some specific interfaces. (Conversely, NPS 3.x extensions relied on an out-of-process
EXE that read and wrote to .ini files in the temp directory.)
NPSShared.dll contains the necessary interfaces to implement. The relevant ones for filters are:
- INPSFilter - Describes a filter and allows access to its properties and lifecycle events.
- INPSHostedExtension - Provides access to an instance of an
IExtensionHost to allow the filter to communicate with the host.
- INPSExtensionHost - Provides host access to enable things like opening the Color Picker dialog, showing a message, or obtaining information about the current foreground color.
- IProgressNotifier - Allows your filter to report progress while it's running
- INPSFormsUI - Defines a UserControl for your filter (if you are using WinForms UI – more on this in another topic)
- INPSFormsHost - For WinForms UI, allows access to WinForms-specific operations as well as more general access to the filter
The extension.ini allows you to specify both the executable name and the class name within it. By default these are both
set to $auto$ which allows the host to automatically find a matching DLL and then a valid class within the DLL.
This works automatically in the vast majority of cases; however there are times when you might want to force it to load a specific file or
class, so you can specify values here.
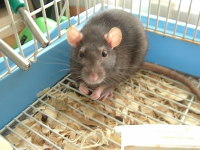
Thumbnail
The thumbnail image will appear in the Filter Gallery and should be a representative sample of what your extension can do.
Ideally you should start with the sample image provided with the sample extensions, which you can save from below if necessary:
If the right debugging options are enabled, you can then right-click on the preview within your extension and save the filtered thumbnail.
Otherwise just apply the filter and save the image as normal.
A file with the name thumbnail.png will default in, but you can override to a different filename by specifying the
Thumbnail directive under [Filter].
Next Steps
Continue on to Creating your UI for information about the different UI options.
For an explanation of what all of the extension.ini directives do, see the
extension.ini reference.
 Home
Table of Contents
Home
Table of Contents